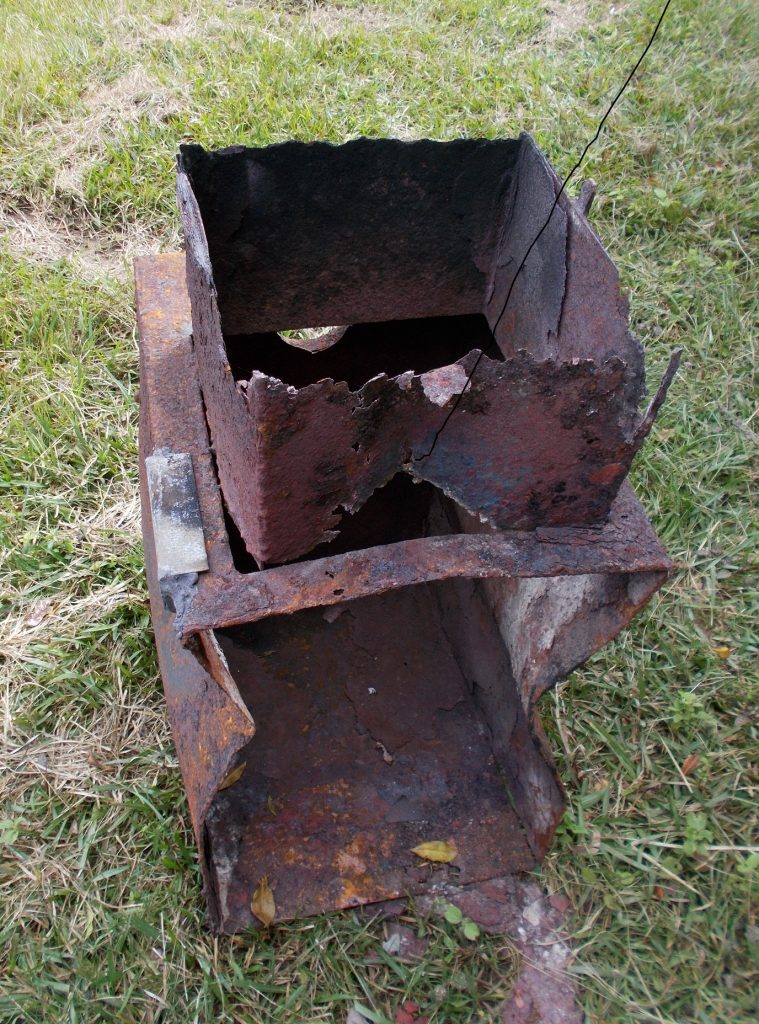
In the last few years the sauna firebox has been springing leaks that let out smoke and made the experience less than optimal unless one wants to be cured like bacon. My welding repairs have been successful until the last few months when it became obvious I was losing the battle. I realised reluctantly that the only fix would be a complete firebox transplant. When I dismantled all the bricks, it became even more evident that it was in even worse condition than I thought.
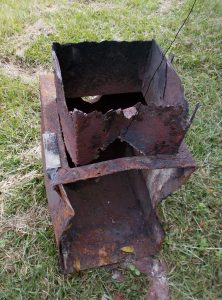
Sorry remains of firebox
In fact it fell apart in my hands with rust that had all the strength of a weetbix, all bent and buckled and holes here and there. Also the inner chimney of stainless steel had holes and 2 of the 3 sections were completely split along their length. That was contributing to the smoke by lack of draw.
Knowing that I could get sheet steel in 1.2m width, I worked out a cutting layout that would result in little wastage. Choosing a firebox size of 600 by 500 by 400, I had dimensions that added up nicely to avoid loss and extra cutting. I needed a sheet 1.2m by 1.7m. The first firebox had been made from 4mm steel because I didn’t think my toy welder could anything thicker. I was right. It was a battle to get the parent metal to melt with only a 100 Amp welder. But this time, just in time, I had been given a 130 amp welder by my good friend Martin, and thought I could weld maybe 6mm steel. From 4mm to 6mm may not sound much, but it is a considerable upgrade in both longevity and challenge. The heat dissipation in 6mm steel is considerably more. The sheet cost $300. It needed to be loaded with a forklift.
Did you know that steel can be cut with a household circular saw? I was surprised that my son-in-law didn’t, hi Blue! and that he battled through steel with an angle grinder. An accidental hero, as it’s much quicker and more accurate with a circular saw. But it’s still not quick with 6mm steel. Goggles and ear protection please before starting the ‘Big Grind’. When I said “household circular saw”, I didn’t mean any saw. Manufacturers have worked out that the average DIY power tool is only used for 10 minutes in its entire life. So they taylor the durability of the tool to that parameter. So the cheapest tool in the shop, generally bought by not the sharpest tool in the shed, is going to go up in smoke during this exercise. Even with an industrial grade saw, it is best to hand test the heat of both the motor and the saw guard and give the saw a rest every metre of cutting or so. However the spectacular showers of sparks makes it all worthwhile! Boys everywhere get turned on by demonstrations of raw power.
So now comes the welding. With my new donated welder and 20kgs of donated 3.2mm rods I’m ready to go. I have a ‘you beaut’ reactive welding helmet loaned by my son-in-law, hi again Blue, which electronically darkens when the arc flashes and makes it so much easier to scratch the arc. I crank everything to the max and off we go. Except the inverter at 3KW continuous and max 4.5KW drops out on overload. Bugger! So I disconnect the cottages and 3 fridges and everything else and try again. I can only get through half a rod of 3.2mm. So I backed off the current from 130A to maybe 120A and try again and it all works. But I was having trouble getting enough heat into the puddle of molten steel to melt both plates of steel to form the weld. I changed my action slightly to stitch a wider arc and dip into the corner more closely and managed to get decent welds. But every time I changed rods the metal cools down and I had a bit I have to patch up. I was running all the equipment to its max, but managed some pretty good welds in the end. I really like welding. I guess it’s the raw power mentioned above.
A few days ago I had finished the firebox and got my son-in-law, hi once again Blue, to help me grunt it down to the sauna shed into place.
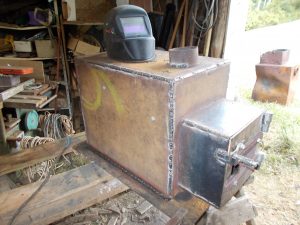
Firebox complete
I have redesigned the covering of the firebox to leave bricks top and bottom and leave the steel exposed between. This hot steel is protected from painful human contact by aluminium security screens of just the right dimensions I happened to have in my shed. It took me a while to connect my needs with the materials available, but I think I have achieved an elegant design. The new model sauna should heat up much quicker and easily get to higher temps with a reduction in fuel use and start up times. Dear frequent guests, better, hotter, sweatier, smoke free saunas now happening.
With thicker steel, better welds, lower firebox body temps with much less brick insulation, I think this sauna will last out my time. Pity really, I’m just getting good at this. Anybody need a sauna?
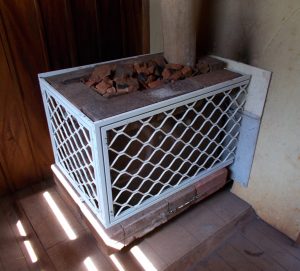
installed and finished
Seems you might get another go at it 🙂
Good on you, Paul. Always a pleasure to read you blog.
Cheers
Don’t give up on your old firebox quite yet. I’ve seen less deserving Turner Prize entries.
Great job Paul, once again you showed how to do it !
Wow.. Rather past it an understatement Paul.. 🙂
I love the new design .. we must come check it out one day, Do you accept Huskies too?.
Huskies? You mean those really hairy wolf things? Have you got one or two? Bit far from snow aren’t you? What do they do in hot weather, fall in the pool and float round with just the nose showing? And what do you mean by “Rather past it an understatement”. I totally deny I’m past it! though some body parts aren’t responding as well as they used to.
Great work !
I can’t wait to try it out.
Wow! You’re a genius Paul.
Ingrid